


Can You Fly with a Retinal Detachment? A Practical Guide for Safe Air Travel
- Dr Rahul Dubey
- 2 days ago
- 14 min read
Imagine you’re at the airport, boarding pass in hand, and a sudden flash of darkness in one eye makes you wonder: can you fly with a retinal detachment?
That moment of panic is all too real for anyone dealing with a retina issue. You’re probably thinking about the pressure changes, the cabin environment, and whether the flight could make the detachment worse.
First, let’s acknowledge the fear. A retinal detachment isn’t just a blurry spot; it’s a serious condition that can lead to permanent vision loss if not treated promptly. In our clinic in Sydney, we see patients who are scheduled for important trips and need clear guidance on travel safety.
So, what does the medical community say? Generally, doctors advise against flying until the retina is re‑attached and stable. The cabin pressure can cause subtle shifts in the eye, and the reduced oxygen levels may affect healing. But every case is unique, and the decision hinges on the size of the tear, the treatment you’ve had, and how far along you are in recovery.
Here’s a quick checklist you can run through before you book that ticket:
Have you had surgery or laser treatment? If yes, wait at least one to two weeks, or follow your surgeon’s specific timeline.
Is the detachment still active? Ongoing leakage or fluid buildup means postponing travel.
Do you have symptoms like sudden flashes, floaters, or a curtain‑like shadow? Those are red flags to stay on the ground.
Have you discussed your travel plans with your retinal surgeon? A personalized assessment is crucial.
And what about the practical side of flying? Keep your eyes hydrated, avoid rubbing them, and wear sunglasses to reduce glare. If you must travel, ask the airline for a seat near the aisle so you can get up easily and avoid prolonged pressure on your face.
Bottom line: you can’t simply answer “yes” or “no” to can you fly with a retinal detachment without a professional evaluation. Reach out to a trusted retina specialist—like our team in Sydney—so you get a clear, individualized plan that lets you travel safely when the time is right.
TL;DR
If you’re wondering whether you can fly with a retinal detachment, the short answer is: wait for your surgeon’s green light and follow a simple pre‑flight checklist.
Once cleared, stay hydrated, keep sunglasses handy, and choose an aisle seat so you can move easily—travel safe and focus on recovery comfortably.
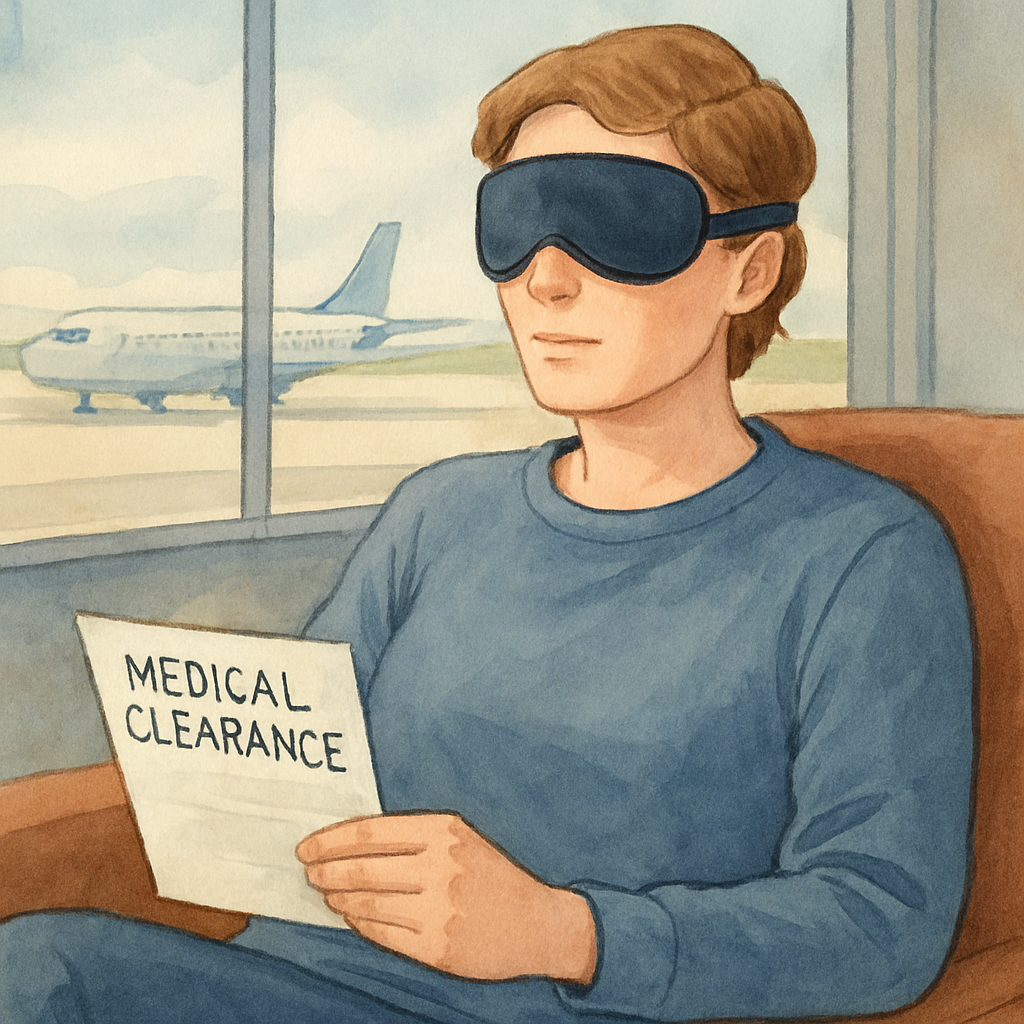
Step 1: Get Medical Clearance Before Booking Your Flight
Imagine you’ve just booked that long‑overdue trip to see family, and the doctor just told you you have a retinal detachment. Your mind races: "Can I still fly?" The first thing you need to do isn’t pack a pillow—it’s get a clear medical green light.
Why is clearance non‑negotiable? Cabin pressure changes can subtly shift fluid inside the eye, and a still‑healing retina is vulnerable. A quick chat with your retina surgeon can tell you whether the tissue is stable enough for altitude.
Here’s a simple three‑step checklist to secure that clearance:
1️⃣ Review Your Post‑Op Timeline
If you’ve had surgery or laser treatment, most surgeons in Sydney recommend waiting at least one to two weeks before any flight. Some cases need a longer pause—especially if you had a pneumatic retinopexy or scleral buckle. In our practice, we look for the absence of new flashes, floaters, or a curtain‑like shadow before signing off.
2️⃣ Schedule a Pre‑Travel Exam
Call the clinic at least a week before you intend to travel. Bring your latest scan results so the surgeon can assess retinal re‑attachment. Ask specific questions: “Is my intra‑ocular pressure within safe limits for a 10‑hour flight?” and “Do I need any medication before take‑off?”
When you’re ready, we’ll walk you through what to expect during the exam and how to document the clearance for the airline, if needed.
3️⃣ Get Written Confirmation
A short note from your retina specialist stating you’re cleared for air travel can save you a lot of hassle. Some airlines ask for it, especially if you need a special seat or assistance. Keep a digital copy on your phone and a printed copy in your carry‑on.
And remember, if you’re still unsure, you can always request a second opinion. It’s your health, after all.
While you’re sorting the paperwork, think about the little comforts that make a flight easier on your eyes. Plug & Carry’s travel‑friendly eye masks are designed to block cabin light without pressure, and they’re compact enough to slip into a handbag.
Another tip: consider using a wellness platform like XLR8well to monitor your overall health metrics while you travel. Keeping an eye on blood pressure and hydration levels can indirectly protect your retina during those long hours in the air.
Once you have that doctor’s note, you can move on to the next part of the pre‑flight checklist—hydration, sunglasses, and seat selection.
Now that you’ve secured clearance, you might wonder what to do if the note says you’re not ready yet. The best move is to reschedule your travel or explore virtual meeting options. It’s frustrating, but it’s far better than risking permanent vision loss.
For those who are cleared, we often recommend a quick review of our Retinal services page to understand post‑flight care steps—especially how to handle any unexpected symptoms once you land.
Finally, keep this mental image: you’re at the gate, passport in hand, a doctor’s note tucked safely in your wallet, and a pair of comfortable, anti‑glare lenses ready to go. That confidence comes from doing the right prep work.
Step 2: Understand Airline Policies for Retinal Detachment
Airlines aren’t exactly eye‑care specialists, but they do have policies that can make or break your trip after a retinal detachment. The first thing to do is call the carrier’s medical desk as soon as you have a tentative itinerary. Ask them straight up: “Do you have any restrictions for passengers who have had a gas or silicone oil bubble placed in the eye?” Most major airlines will ask for a doctor’s note and will note the request on your reservation.
Why does that matter? A gas bubble expands when cabin pressure drops, which can increase intra‑ocular pressure and, in the worst case, cause a re‑detachment. The American Academy of Ophthalmology warns that “a gas bubble in the eye can expand dangerously if the patient flies” and recommends waiting until the bubble is fully absorbed before you climb to cruising altitude. American Academy of Ophthalmology provides the full guidance.
Step‑by‑step checklist for airline communication
1.Get a written clearancefrom your retinal surgeon that states the type of intra‑ocular tamponade used (gas vs. silicone oil) and the safe date to travel.
2.Call the airline’s medical servicesat least 48 hours before departure. Quote the exact wording from your doctor’s note.
3.Request a seat assignmentthat lets you stand up easily – an aisle seat near the front is ideal. Explain that you may need to move frequently to keep pressure off your face.
4.Ask about cabin pressure options.Some airlines offer a “pressurised cabin” or allow you to sit in a section with a slightly higher cabin altitude (often business class). If that’s available, it can reduce the pressure swing on your eye.
Real‑world examples
Sarah, a 42‑year‑old teacher from Sydney, had a pneumatic retinopexy with a 20% SF6 gas bubble. Her surgeon cleared her to fly after 10 days, but only after she called Qantas and provided the clearance note. Qantas flagged her reservation, gave her an aisle seat, and reminded the crew to avoid sudden cabin‑pressure changes during take‑off and landing. She arrived home without any vision change.
Mark, a 58‑year‑old accountant, underwent a vitrectomy with silicone oil. Because silicone oil doesn’t expand, his surgeon said he could travel as soon as his stitches were removed. He called Virgin Australia, who confirmed no extra restrictions. Mark’s experience shows that the type of tamponade makes a huge difference.
What to do if the airline says “no”
If the carrier refuses to accommodate you, you have two options. First, ask for a “medical waiver” – a formal document that the airline can file with their safety department. Second, consider switching to an airline with a more flexible medical policy. In either case, keep a copy of every email or phone note; you’ll thank yourself if a gate agent asks for proof.
And remember, the airline’s policy is only one piece of the puzzle. Your surgeon’s advice trumps everything. If you’re ever in doubt, postpone the flight – the cost of a delayed trip is nothing compared to permanent vision loss.
For a deeper dive into why retinal tears happen in the first place, check out our guide on retinal tear causes . It explains the mechanics that make gas bubbles risky and helps you ask the right questions.
Looking for travel‑friendly gear to keep your eyes comfortable on the plane? Plug & Carry offers lightweight eye masks and anti‑glare lenses that are perfect for long‑haul flights. Pair that with a wellness tracker from XLR8well to monitor hydration and stress levels – both of which can influence eye pressure during travel.
Step 3: Pack a Travel Kit That Protects Your Eyes
Now that you’ve cleared the medical and airline hurdles, the next thing that can make or break your flight is what you actually bring on board. Think of your travel kit as a little “eye‑care emergency room” you can carry in a zip‑top pouch. The goal? Keep your eye moist, shield it from harsh cabin light, and give yourself quick ways to manage any surprise discomfort.
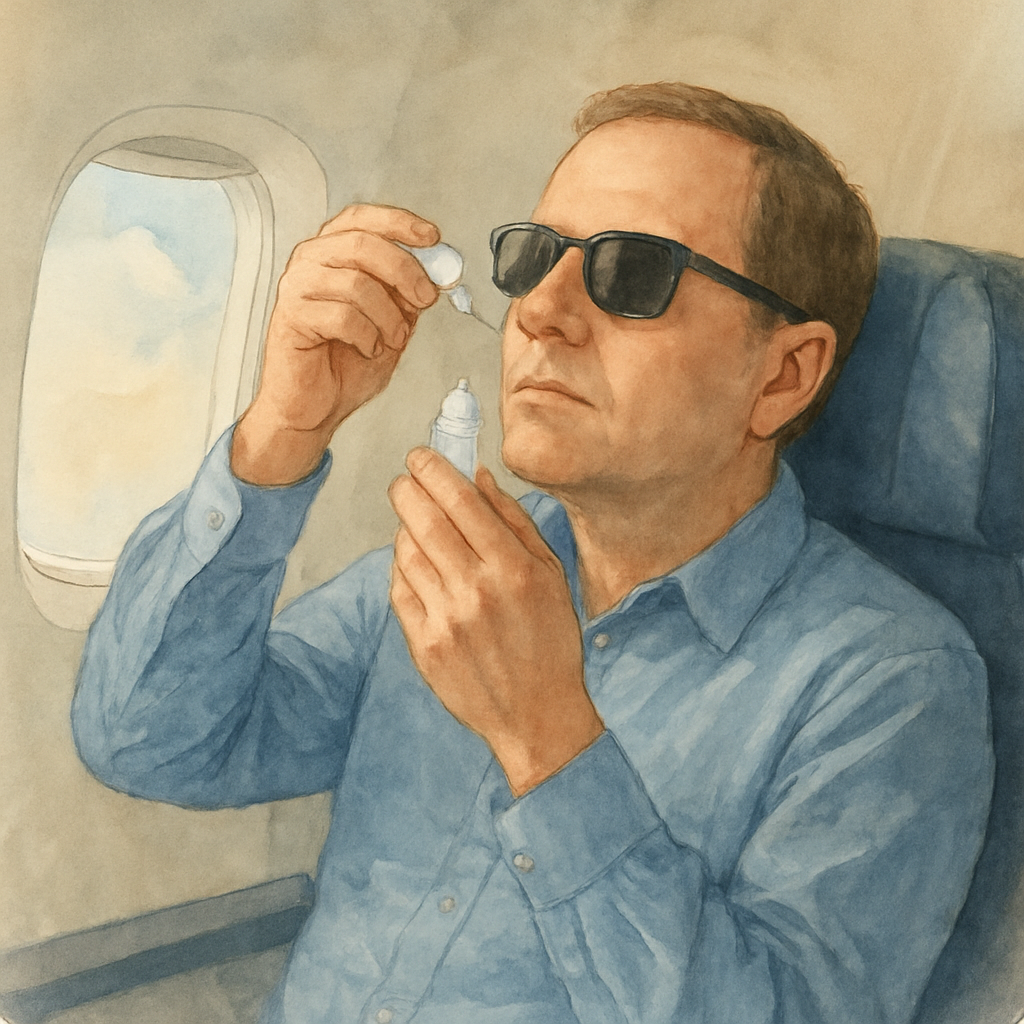
1. Lubricating drops – your first line of defense
Cabin air is notoriously dry, often dropping humidity to below 20 %. That dryness can aggravate any residual inflammation after retinal surgery. Pack a preservative‑free bottle of lubricating drops (the kind we usually prescribe after a vitrectomy). Bring two small 5‑ml bottles – one for the flight and one as a backup in case the first runs dry.
Tip: ask your clinic to label the bottle with the exact dosage schedule. We’ve seen patients who simply “spray when it feels dry” end up over‑using drops and getting blurry vision. A written reminder keeps you on track.
2. Anti‑glare sunglasses – block the glare, not the view
Even with the window shades down, the bright LED panel lighting can cause photophobia, especially if you have a gas bubble still in the eye. A pair of polarized, wrap‑around sunglasses that fit comfortably over your prescription glasses (if you wear them) will cut glare by up to 70 %.
Real‑world example: Sarah, a 38‑year‑old teacher from Sydney, swore by a lightweight pair of anti‑glare lenses she bought at a local optometrist. She reported no extra eye strain on a 12‑hour flight, whereas a fellow traveler who skipped the glasses complained of a gritty feeling that lingered for days.
3. Compression‑friendly eye mask – sleep without pressure
If you plan to nap, choose an eye mask that doesn’t press on the orbital rim. Look for masks with a soft, contoured design and a breathable fabric. A mask that hugs the forehead rather than the eye socket reduces the risk of accidental pressure on the retina.
We recommend the “travel‑lite” mask from Plug & Carry – it’s lightweight, machine‑washable, and fits snugly without squeezing the eyes.
4. Hydration and snack strategy
Dehydration can raise intra‑ocular pressure, a subtle but real threat after retinal procedures. Aim for at least 2 liters of water before boarding, and sip a little every 30 minutes during the flight. Pack electrolyte‑rich sachets (like a low‑sugar sports drink powder) to keep your fluid balance steady.
Pair your water with a protein‑rich snack – a handful of nuts or a protein bar – to avoid blood‑sugar spikes that can make you feel jittery and lead to accidental eye rubbing.
5. Emergency contact card – the safety net
Write down your surgeon’s name, phone number, and the exact date of your last procedure. Slip the card into your wallet and also tape a copy to the inside of your carry‑on. If a flight attendant notices you looking uncomfortable, they’ll know you have a medical condition that warrants a quick check.
We’ve seen this save a traveler who suddenly felt a “pressure pop” mid‑flight; the crew alerted a flight doctor who helped the passenger use drops and adjust the seat position, averting a panic attack.
6. Packing checklist – keep it simple
Two preservative‑free lubricating drop bottles (5 ml each)
Polarized anti‑glare sunglasses that fit over prescription lenses
Contoured eye mask that avoids orbital pressure
2 L water bottle + electrolyte sachets
Protein‑rich snack (nuts, bar, or cheese)
Emergency contact card with surgeon’s details
Before you zip your bag, run through this list one more time. It only takes a minute, but it can mean the difference between a smooth arrival and an unexpected trip back to the clinic.
And if you want a deeper dive into how retinal tears behave after surgery, check out our detailed guide on pvd vs retinal detachment symptoms: What to Look For and When to Act . Knowing the warning signs helps you react fast if anything changes mid‑flight.
Step 4: Manage In‑Flight Pressure Changes and Emergencies
We’ve gotten you through clearance, airline talk, and packing. Now comes the moment that actually tests whether you can stay calm when the cabin door closes: the pressure shift. If you’ve ever felt that funny “pop” in your ears during take‑off, you know the sensation can be unsettling. For a healing retina, that pop can feel a lot scarier because the eye is still fragile.
So, what should you do the instant the cabin starts to equalise? First, breathe. Deep, slow breaths keep your body relaxed and prevent you from inadvertently squeezing your face against the seat or headrest – a common trigger for increased intra‑ocular pressure.
Know the physics – gas bubbles expand
Most retinal repairs that involve a gas tamponade (SF6, C3F8, or even a small air bubble) are vulnerable to altitude changes. The gas expands about 2‑3% for every 1,000 ft rise in cabin altitude. In a typical commercial flight cruising at 35,000 ft, that can mean a 30‑40% increase in bubble size. The Pepose Vision guide on flying after retinal surgery notes that an expanding bubble can raise intra‑ocular pressure enough to cause pain, blurred vision, or—rarely—re‑detachment.
Because of that, the first actionable step is to keep the pressure on your eye as even as possible.
Step‑by‑step in‑flight pressure management
Adjust your seat position.Tilt the headrest forward slightly so your face isn’t pressed flat against the cushion. This tiny change reduces direct pressure on the orbital rim.
Use lubricating drops.Apply one drop of preservative‑free artificial tears every 30 minutes. The moisture helps the eye tolerate subtle pressure fluctuations.
Stay hydrated.Dehydration thickens the blood, which can increase eye pressure. Sip water continuously – aim for a glass every 20 minutes.
Avoid Valsalva maneuvers.Don’t forcefully exhale with a closed mouth and nose (like when trying to pop your ears). If you need to equalise ear pressure, do it gently with a yawn or chew gum.
Signal the crew if you feel pain.Show them your emergency contact card. Flight attendants can call a medical professional on board or request a seat change if you need to recline or stretch.
And if you notice a sudden increase in floaters, flashes, or a “curtain” effect, treat it as an emergency. Let the crew know immediately – most airlines have a flight doctor or a qualified medical volunteer who can assess you.
Here’s a quick checklist you can keep on the back of your boarding pass:
Scenario | Immediate Action | Pro Tip |
Ear‑pop feeling, mild eye pressure | Adjust headrest, use drops | Keep a spare bottle in the seat pocket |
Sharp pain, vision blur, new floaters | Alert crew, request medical assistance | Show emergency contact card right away |
Dehydration signs (dry mouth, dizziness) | Drink water, add electrolyte sachet | Set a phone alarm every 30 min as a reminder |
Real‑world example: Emily, a 35‑year‑old graphic designer from Sydney, flew to Melbourne two weeks after a pneumatic retinopexy with a 20% SF6 bubble. Mid‑flight, she felt a subtle pressure rise and a faint flash. She applied her drops, adjusted her seat, and told the flight attendant. The attendant called the onboard doctor, who confirmed her symptoms were normal bubble expansion. Emily landed without any vision loss and credited the quick drop routine for keeping her calm.
Another case: Carlos, a 48‑year‑old accountant, had silicone oil placed after a vitrectomy. Because silicone oil doesn’t expand, his airline cleared him without extra steps. Still, he followed the same hydration and drop schedule – a habit that helped him avoid dry‑eye discomfort that could otherwise trigger rubbing and pressure spikes.
Notice a pattern? Whether you have gas or oil, the core actions—proper seat positioning, regular lubrication, and open communication with the crew—remain the same. The difference is how closely you watch for bubble‑related symptoms.
In our clinic, we often give patients a one‑page “In‑Flight Emergency Sheet.” It lists their specific tamponade type, the date of clearance, and the exact drop schedule. Hand it to the flight crew if you feel uneasy. It’s a tiny piece of paper, but it can prevent a panic‑inducing misunderstanding.
And for those wondering about the recovery timeline after a pneumatic retinopexy, our pneumatic retinopexy recovery guide breaks down when the bubble typically resorbs – usually 2‑3 weeks. Knowing that window helps you plan flights when the risk is lowest.
Conclusion
So, you’ve walked through clearance, airline talk, packing, and in‑flight pressure tricks. The core truth? Flying with a retinal detachment isn’t a gamble if you let the surgeon set the rules, keep your eyes hydrated, and stay honest with the crew.
Remember Carlos and Sarah – one with silicone oil, the other with a gas bubble. Both made it across the sky because they followed the same simple checklist: seat positioning, drops on schedule, and a clear note for the airline. If you mirror that routine, the odds of a mid‑flight surprise drop dramatically.
What’s the next step? Grab the one‑page “In‑Flight Emergency Sheet” we hand out at our clinic and tuck it into your carry‑on. Pair it with the Scleral Buckle Recovery guide for a quick refresher on healing timelines. Knowing when the bubble or oil is fully settled lets you pick the safest travel window.
Finally, if any doubt creeps in – a new flash, unexpected pressure, or just a nervous feeling – pause, use a drop, and alert the crew. Better safe than sorry, and you’ll land with your vision intact and your travel plans still on track.
FAQ
Can I fly with a retinal detachment if I’ve just had surgery?
Short answer: only after your surgeon gives you the green light. Most retinal repairs need a waiting period—usually 1‑2 weeks for laser work, up to 4‑6 weeks for vitrectomy or scleral buckle—before cabin pressure won’t risk re‑detachment. Call your retina surgeon, tell them your travel dates, and ask for a written clearance. That note is your ticket to a stress‑free flight.
What should I do if I feel a flash or new floaters during the flight?
First, stay calm and use a lubricating drop. If the flash persists or your vision gets cloudy, alert a flight attendant right away and show them your emergency contact card. Most airlines have a medical professional on board who can help you stay comfortable until you land. Don’t wait—early action prevents a small irritation from becoming a serious problem.
Do gas bubbles in the eye expand at cruising altitude?
Yes, any intra‑ocular gas (SF6, C3F8) expands as the cabin pressure drops. That can raise intra‑ocular pressure and cause discomfort or, in rare cases, a re‑tear. That’s why we always tell patients to avoid flying until the bubble has shrunk enough—typically 2‑3 weeks after a pneumatic retinopexy. If you must travel sooner, a specialist‑approved note and a seat that lets you adjust your head position are essential.
Is there a specific seat I should request on the plane?
An aisle seat near the front works best. It lets you stand up, stretch, and move without disturbing neighbors, which reduces facial pressure. You’ll also have easier access to the restroom, so you won’t feel the urge to hold your breath or strain your eyes. Mention your medical note when you book; most carriers will note the request on your reservation.
How can I keep my eyes hydrated during a long‑haul flight?
Pack two preservative‑free lubricating drop bottles—one in your carry‑on, one in the seat pocket. Apply a drop every 30 minutes, especially after you’ve taken off or when the cabin lights are bright. Sip water continuously; aim for a glass every 20 minutes. Hydration keeps the tear film stable and helps prevent the eye from feeling dry or gritty.
What if the airline refuses to accommodate my medical needs?
If a carrier says “no,” ask for a medical waiver. That’s a formal document the airline can file with its safety team. You can also consider switching to a different airline with a more flexible policy. Keep copies of every email or phone note—you’ll thank yourself if a gate agent asks for proof of clearance.
Comments